How to Set-Up Your Email in Windows Live
This tutorial shows you how to set up Windows Live to work with your email account.
![]()
Click on the "Add an e-mail account button located on the left (refer image
above), or go to "Tools" -> "Accounts" and hit the "Add" button. Now choose
"E-mail Account".
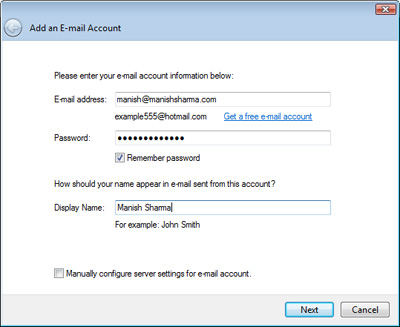
Whichever path you take, you should get the Add an E-mail Account window similar
to one below.
Enter your email address, your password and display name. Ensure the "Remember
password" box is checked unless you are paranoid about security and want to
enter the password every time you access your account. Hit the "Next" button to
continue
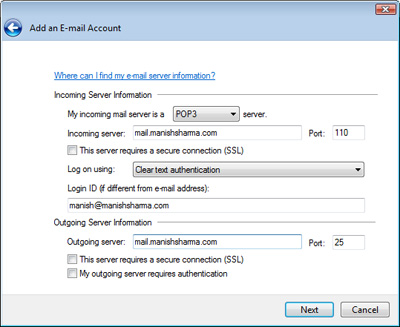
You now need to select your incoming mail server type (POP3) and type in the address (yourname@yourdomain.co.nz) and port number (default 110). You now need to put in the Outgoing email server address (mail.yourdomain.co.nz). Be sure to tick 'My outgoing server requires authentication'. To continue, click on the "Next" button
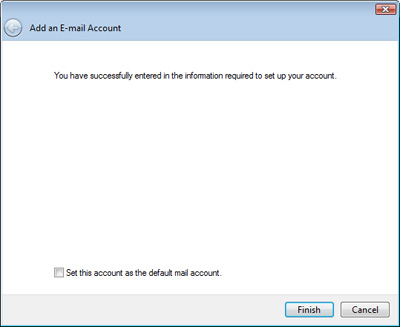
The Windows Live Mail setup process is now complete. You have a choice of
setting the new account as the default by checking the box
When a new email account is added on Windows Live Mail, the program creates 5 new folders - The Inbox, Drafts, Sent items, Junk e-mail and Deleted items - refer image below
For all you Outlook Express users - The Junk e-mail folder was included in
Windows Mail Vista as a part of the automated junk email filter utility and
carried forward to Windows Live Mail email client.
Next Step - Modifying the properties of the email account
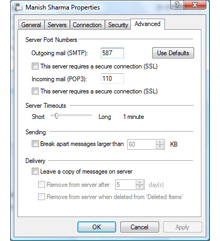
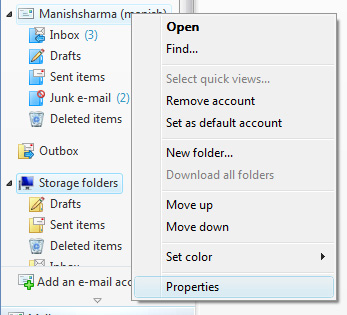
The last step is to modify the properties of the newly set up email account.
Right-click on the account name in the left panel and select "Properties". Under the
generals tab, enter the reply email address and then shift your attention to the
Advanced tab. Change the "Outgoing mail (SMTP)" server port number to 26. Check the "Leave a copy of messages on server"
and select the number of days to keep emails. Click OK and you are done!.